WriteIDE 0.7.7 brings the whole writing workflow together
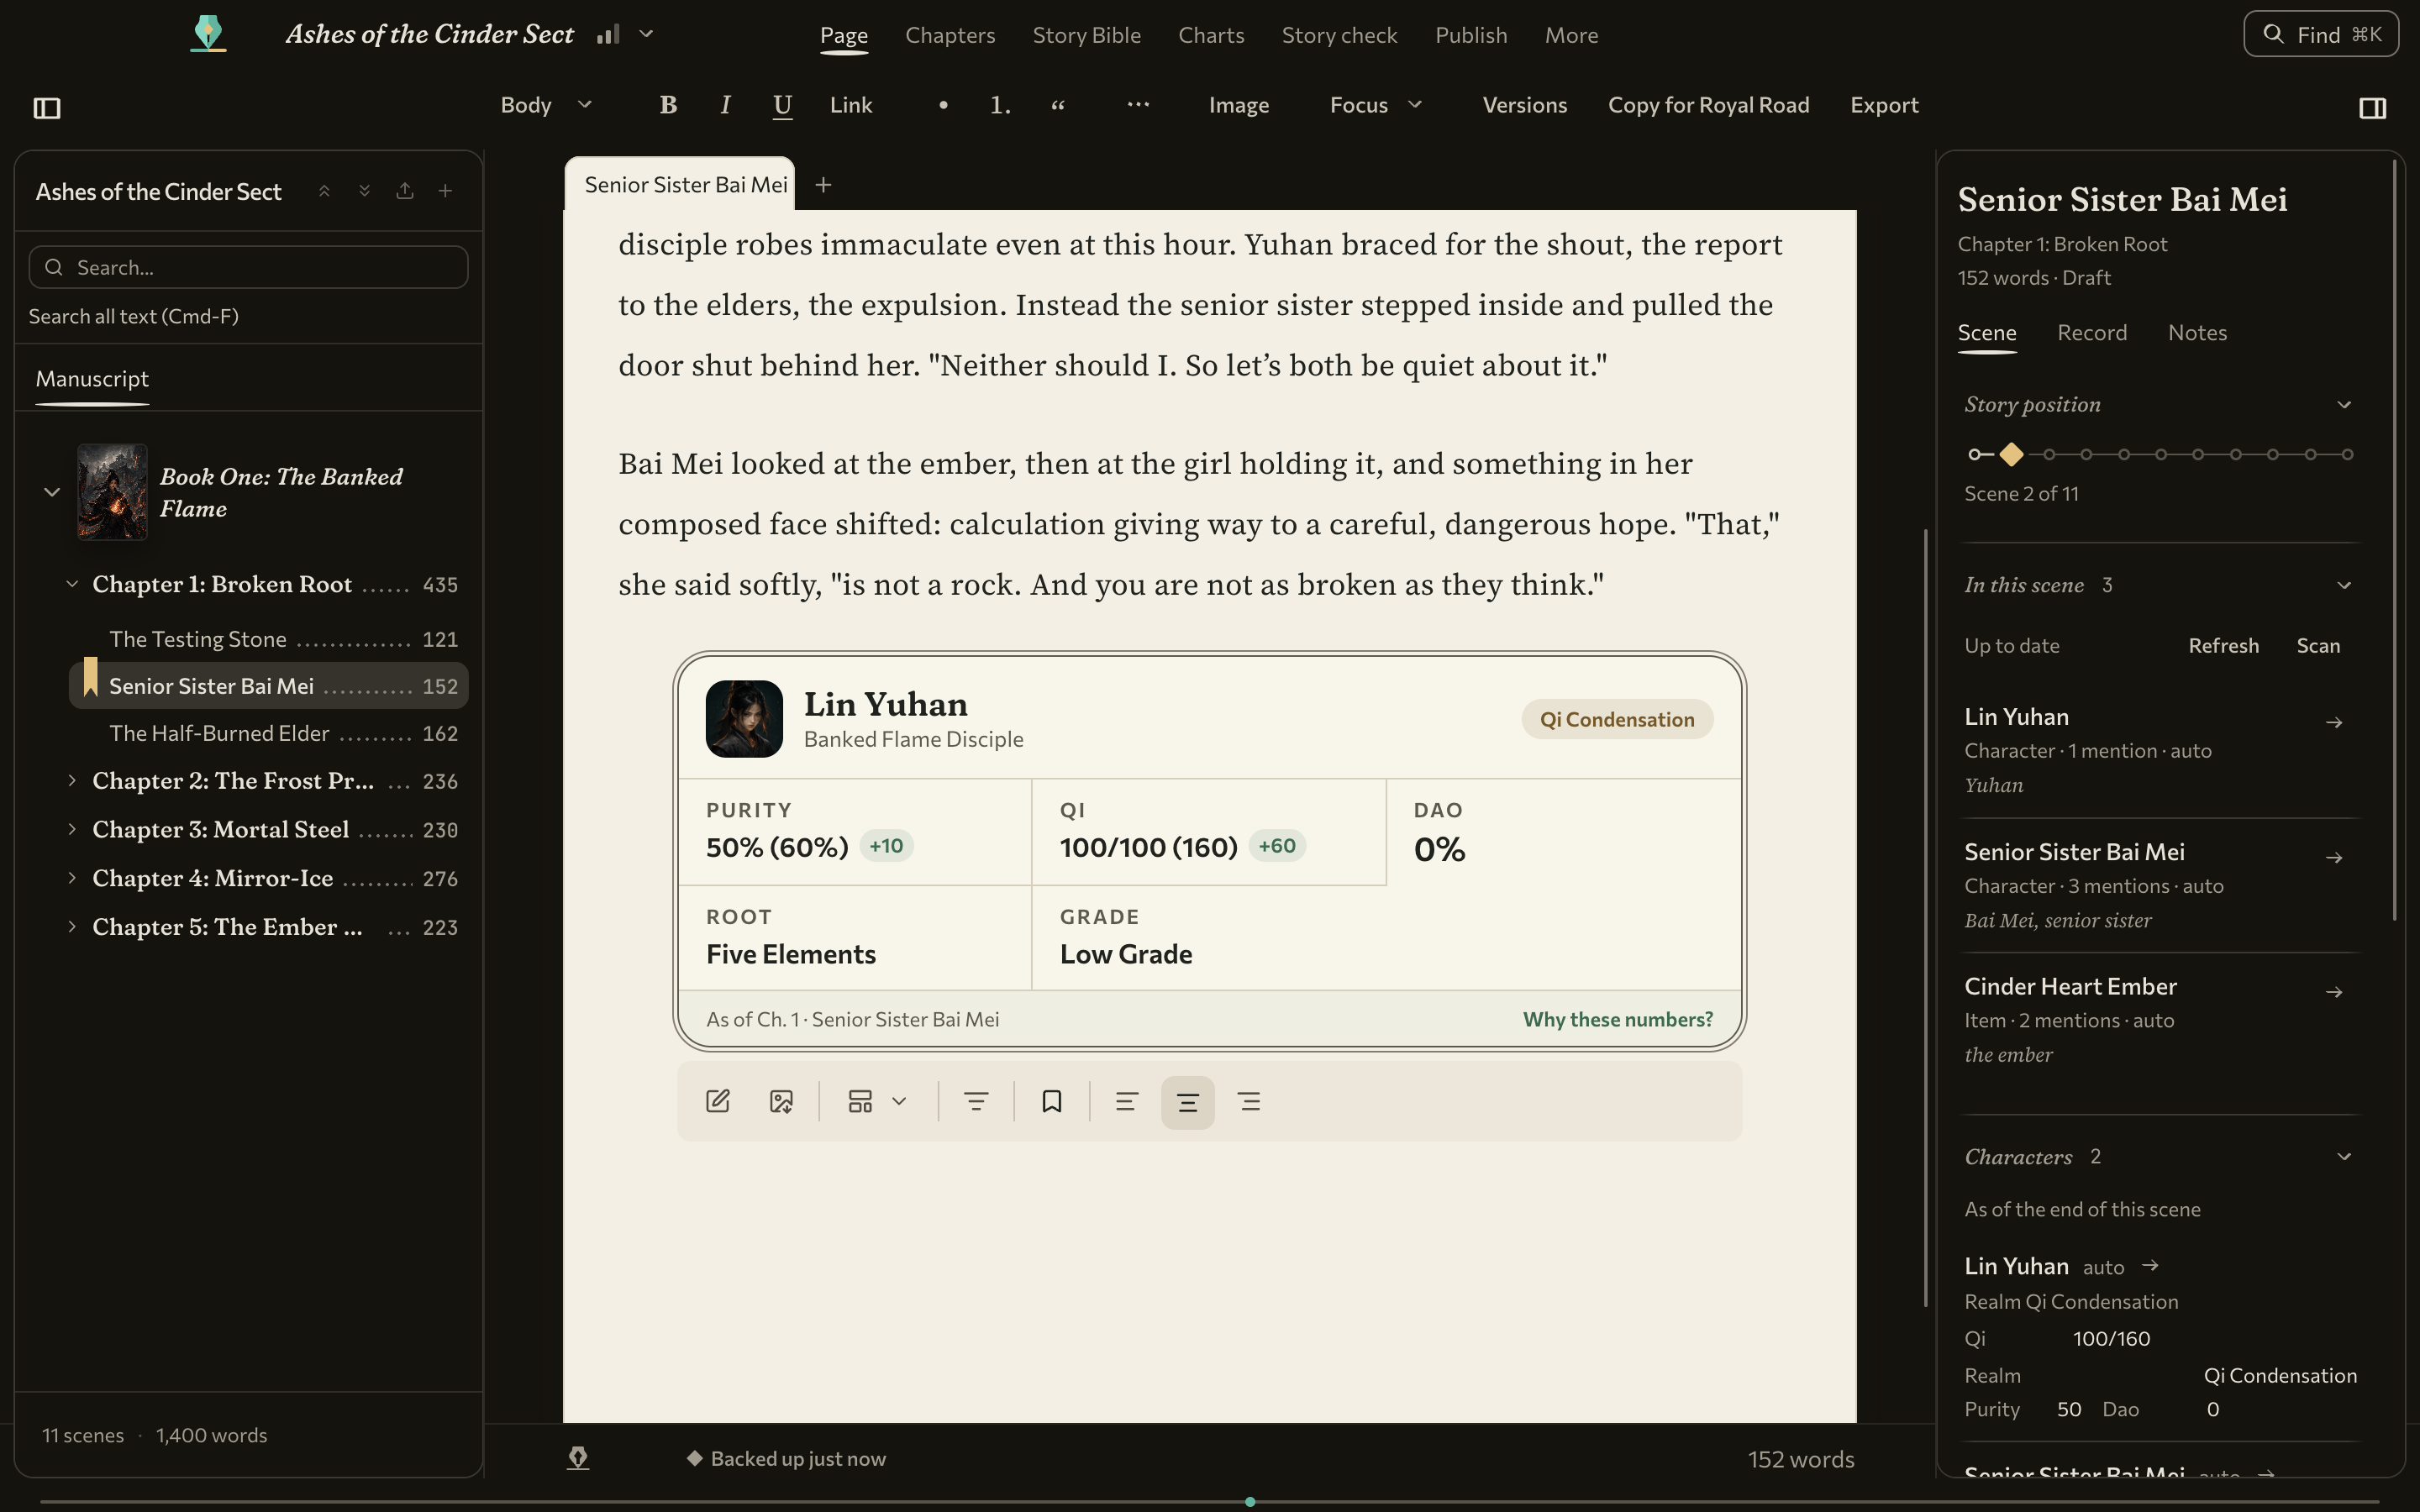
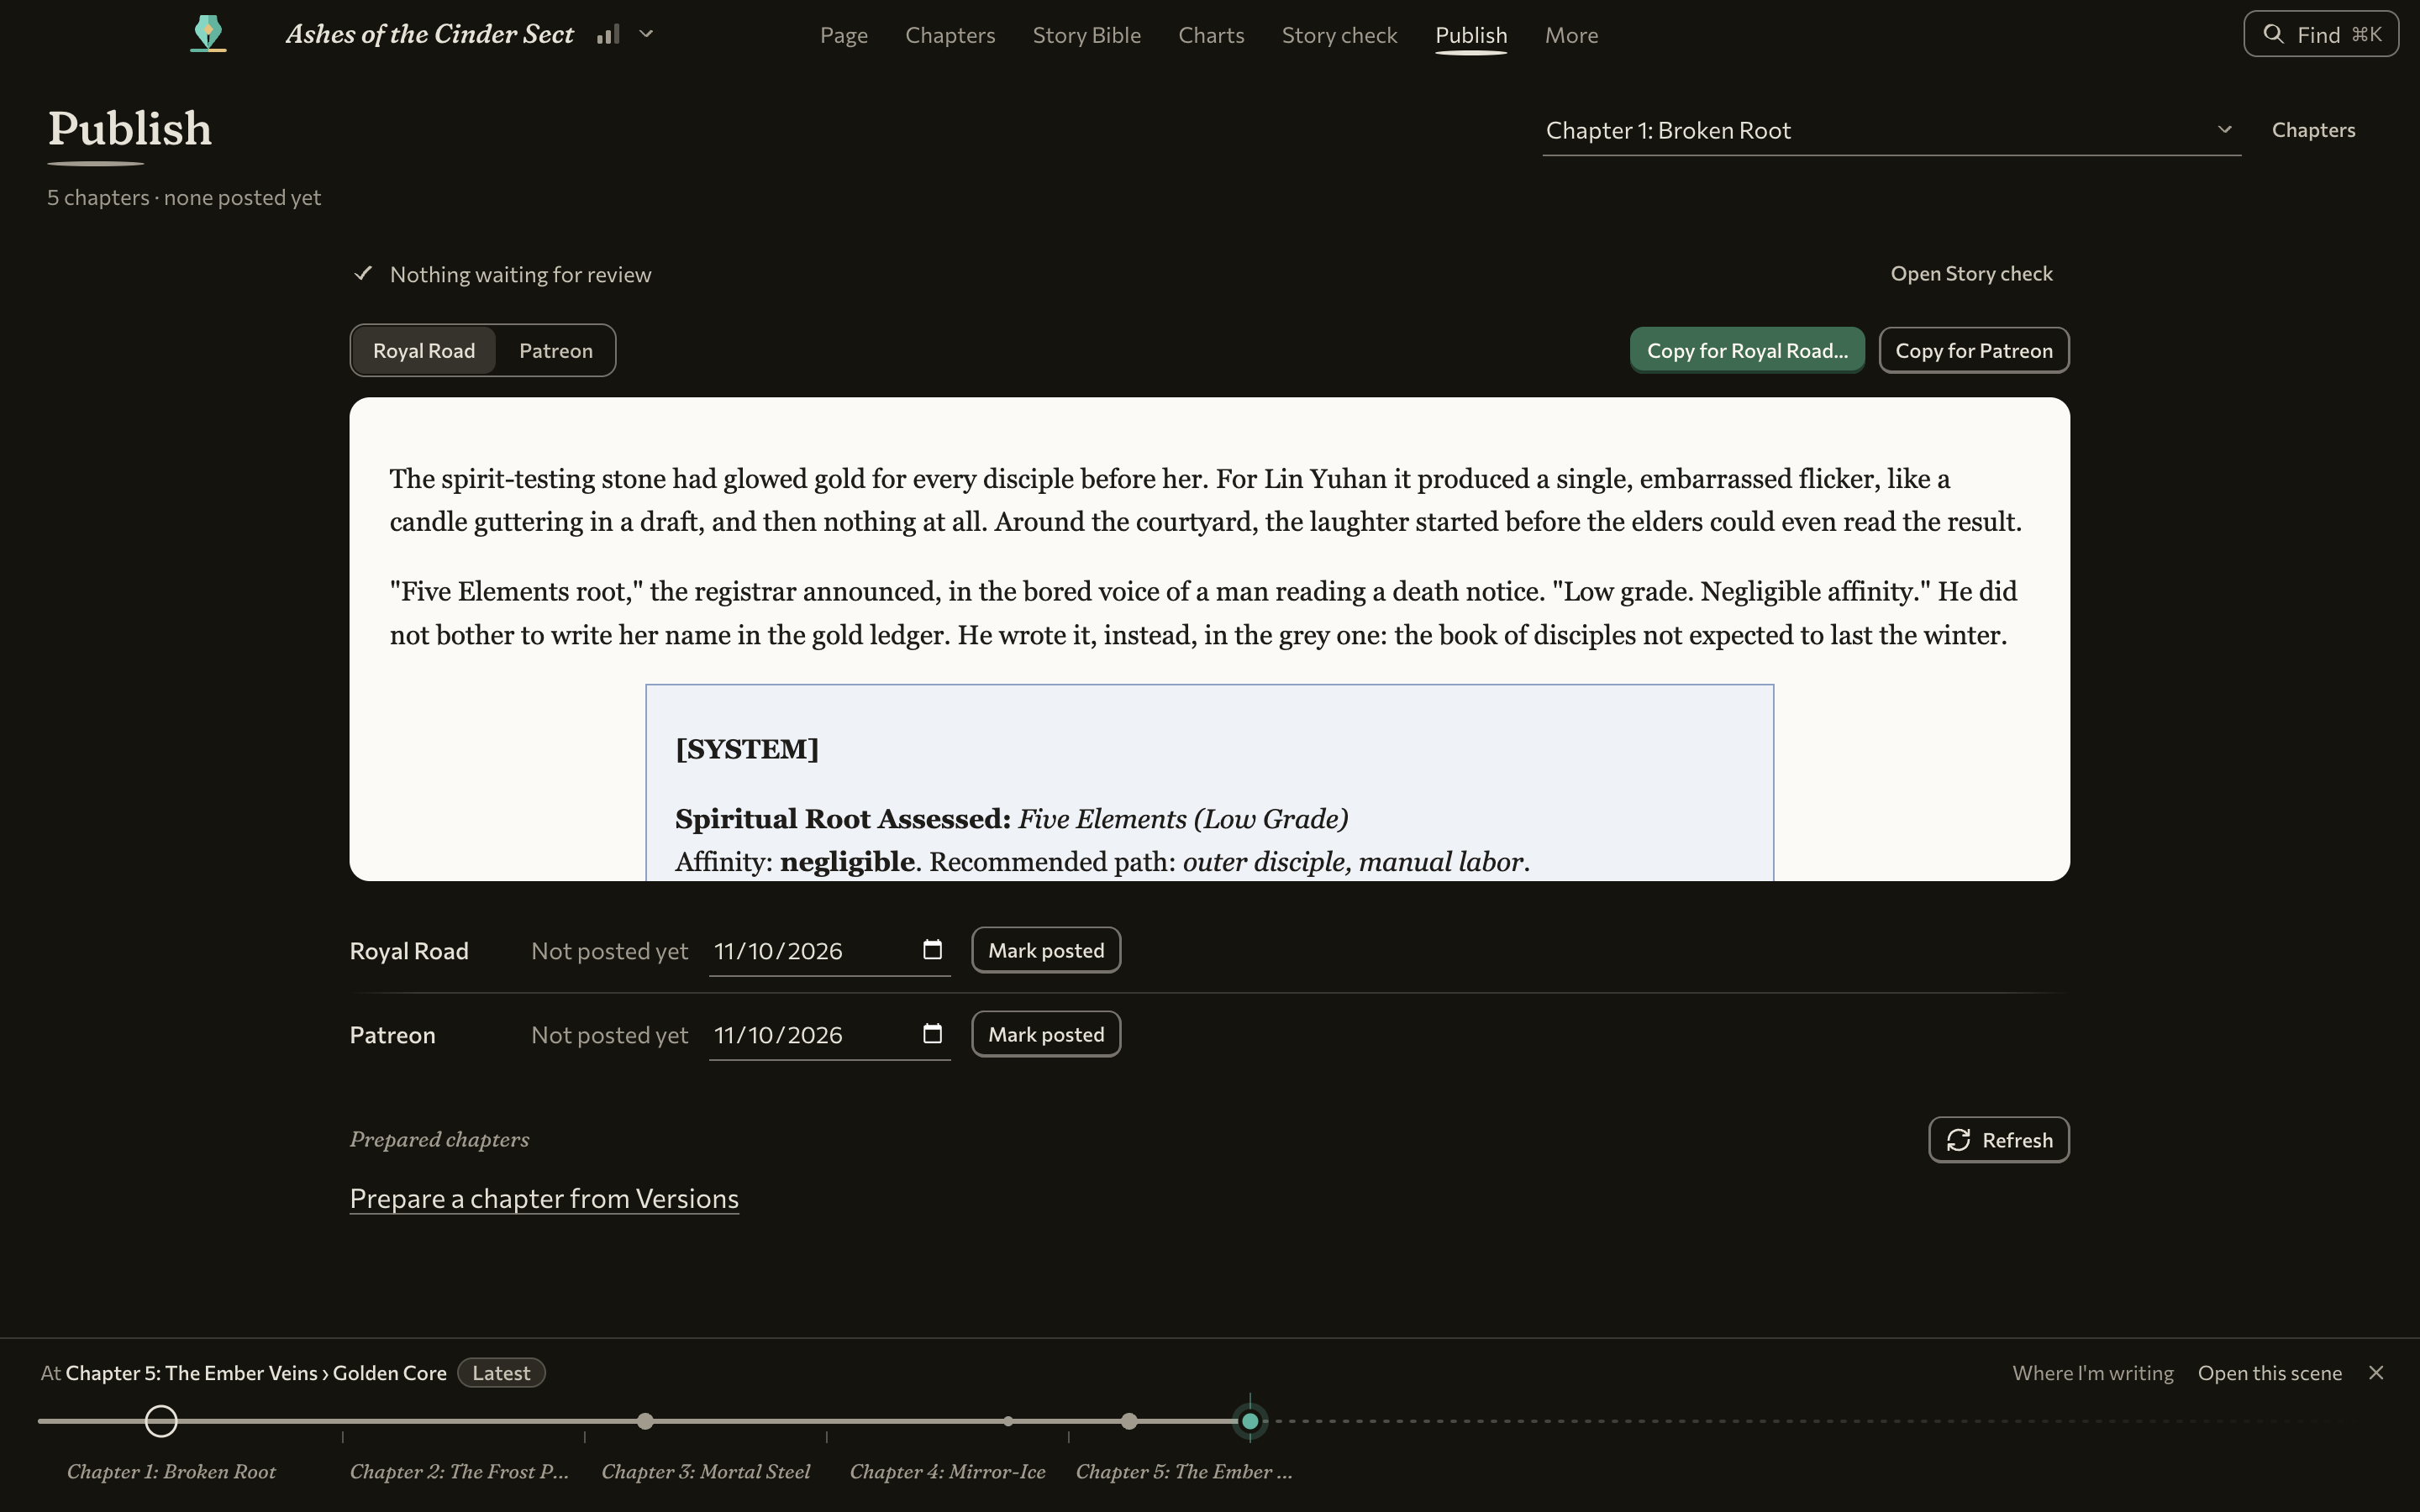
In the included example, Ashes of the Cinder Sect, Lin Yuhan has just found the ember. While editing the scene, you can check her Realm and Qi beside the page, then open Chapters to see where the scene sits in the book. Story Bible puts her aliases and manuscript mentions together. To post Broken Root, open Chapters, find Broken Root, and choose its Ready to post link. Publish opens that chapter so you can preview its system box, copy the chapter, and go back to Page to keep working.
That is the workflow I wanted from WriteIDE 0.7.7. The writing desk, story records, and posting tools now share the same frame, with fewer detours between them. The screenshots below use the finished example you can open inside WriteIDE.
A writing desk that grows with the book
A fresh library opens on a blank page so you can start writing. Choose Just write, Track my story, or Run the whole system from the book menu. Just write keeps Page, Chapters, and Publish close. Track my story puts Story Bible, Charts, and Story Check on the top bar. Run the whole system exposes more of the tools for stats, items, skills, and quests. The choice is per book, so a new draft and a long-running serial can open with different tools in view.
On Page, open the chapter list and scene panel into the margins when you need them. Close them or use Focus Mode when you want the manuscript to yourself. The scene panel has separate places for context, recorded changes, and notes. Use Record to apply a character change at the named scene and choose whether to add its text or block to the manuscript. The Why these numbers? action on a tracked stat block still explains the values on the page.
Type @Lin to find Lin Yuhan without leaving the sentence. The @ menu searches names and aliases across characters and other Story Bible records, with groups for people, items, places, and more. Character rows show the available level or realm and class at that scene. A record introduced later is labelled Not in the story yet here, so you can spot a name the story has not reached. If a name has no match, choose Create as a Character, Item, or Place to add it to Story Bible at the current scene.
Inline slash commands preview damage, healing, and item changes beside your prose before you record them. For damage or healing, check the character and the before-and-after resource values at the scene. Choose Record when the preview is right; Esc keeps the text you typed. Supported damage, healing, and item records can be undone with their inserted text using Cmd/Ctrl+Z and reapplied with redo. WriteIDE checks whether the recorded change can still be safely reversed. If later changes prevent it, your text may come back while the change stays recorded; read the warning and check Recorded Changes in the scene panel.
You can introduce a new material while recording loot, too. Type /loot Lin Yuhan 2 Ember Shards, choose Create "Ember Shards", and review the grant. Choosing Create prepares the preview; Record creates the material at that scene and adds it to her inventory together. /give offers the same creation path, while /equip previews equipping an existing item.
The + beside your writing tabs opens Go to scene. Cmd/Ctrl+click or middle-click a scene in the chapter list to open it in another tab. Back and Forward can restore the caret or text selection you left in unchanged text during the same session. The selection menu also fits near the top of the page, and the workspace uses the same typography, controls, and focus cues across light and dark themes.
When a sentence needs another look, use Cmd/Ctrl+K → Set aside this line, add an optional reminder, and press Enter to keep it. The prose stays on the page. Open Tray from the same command menu to see those lines in story order. Show me takes you back to a passage, Done clears its reminder, and Back to writing closes the tray so you can carry on.
Chapters, planning, and getting words back
Chapters shows the whole book with scenes, word counts, and posting status. Select a scene to open it, or use a chapter’s Ready to post link to open that chapter in Publish. The top-bar Publish button opens the next chapter to post. The story line lets you stand at a particular moment while you check what the story records there. Where I’m writing returns the story position to the current writing scene, and Back to latest takes it to the end. You can close the story line when you need the space.
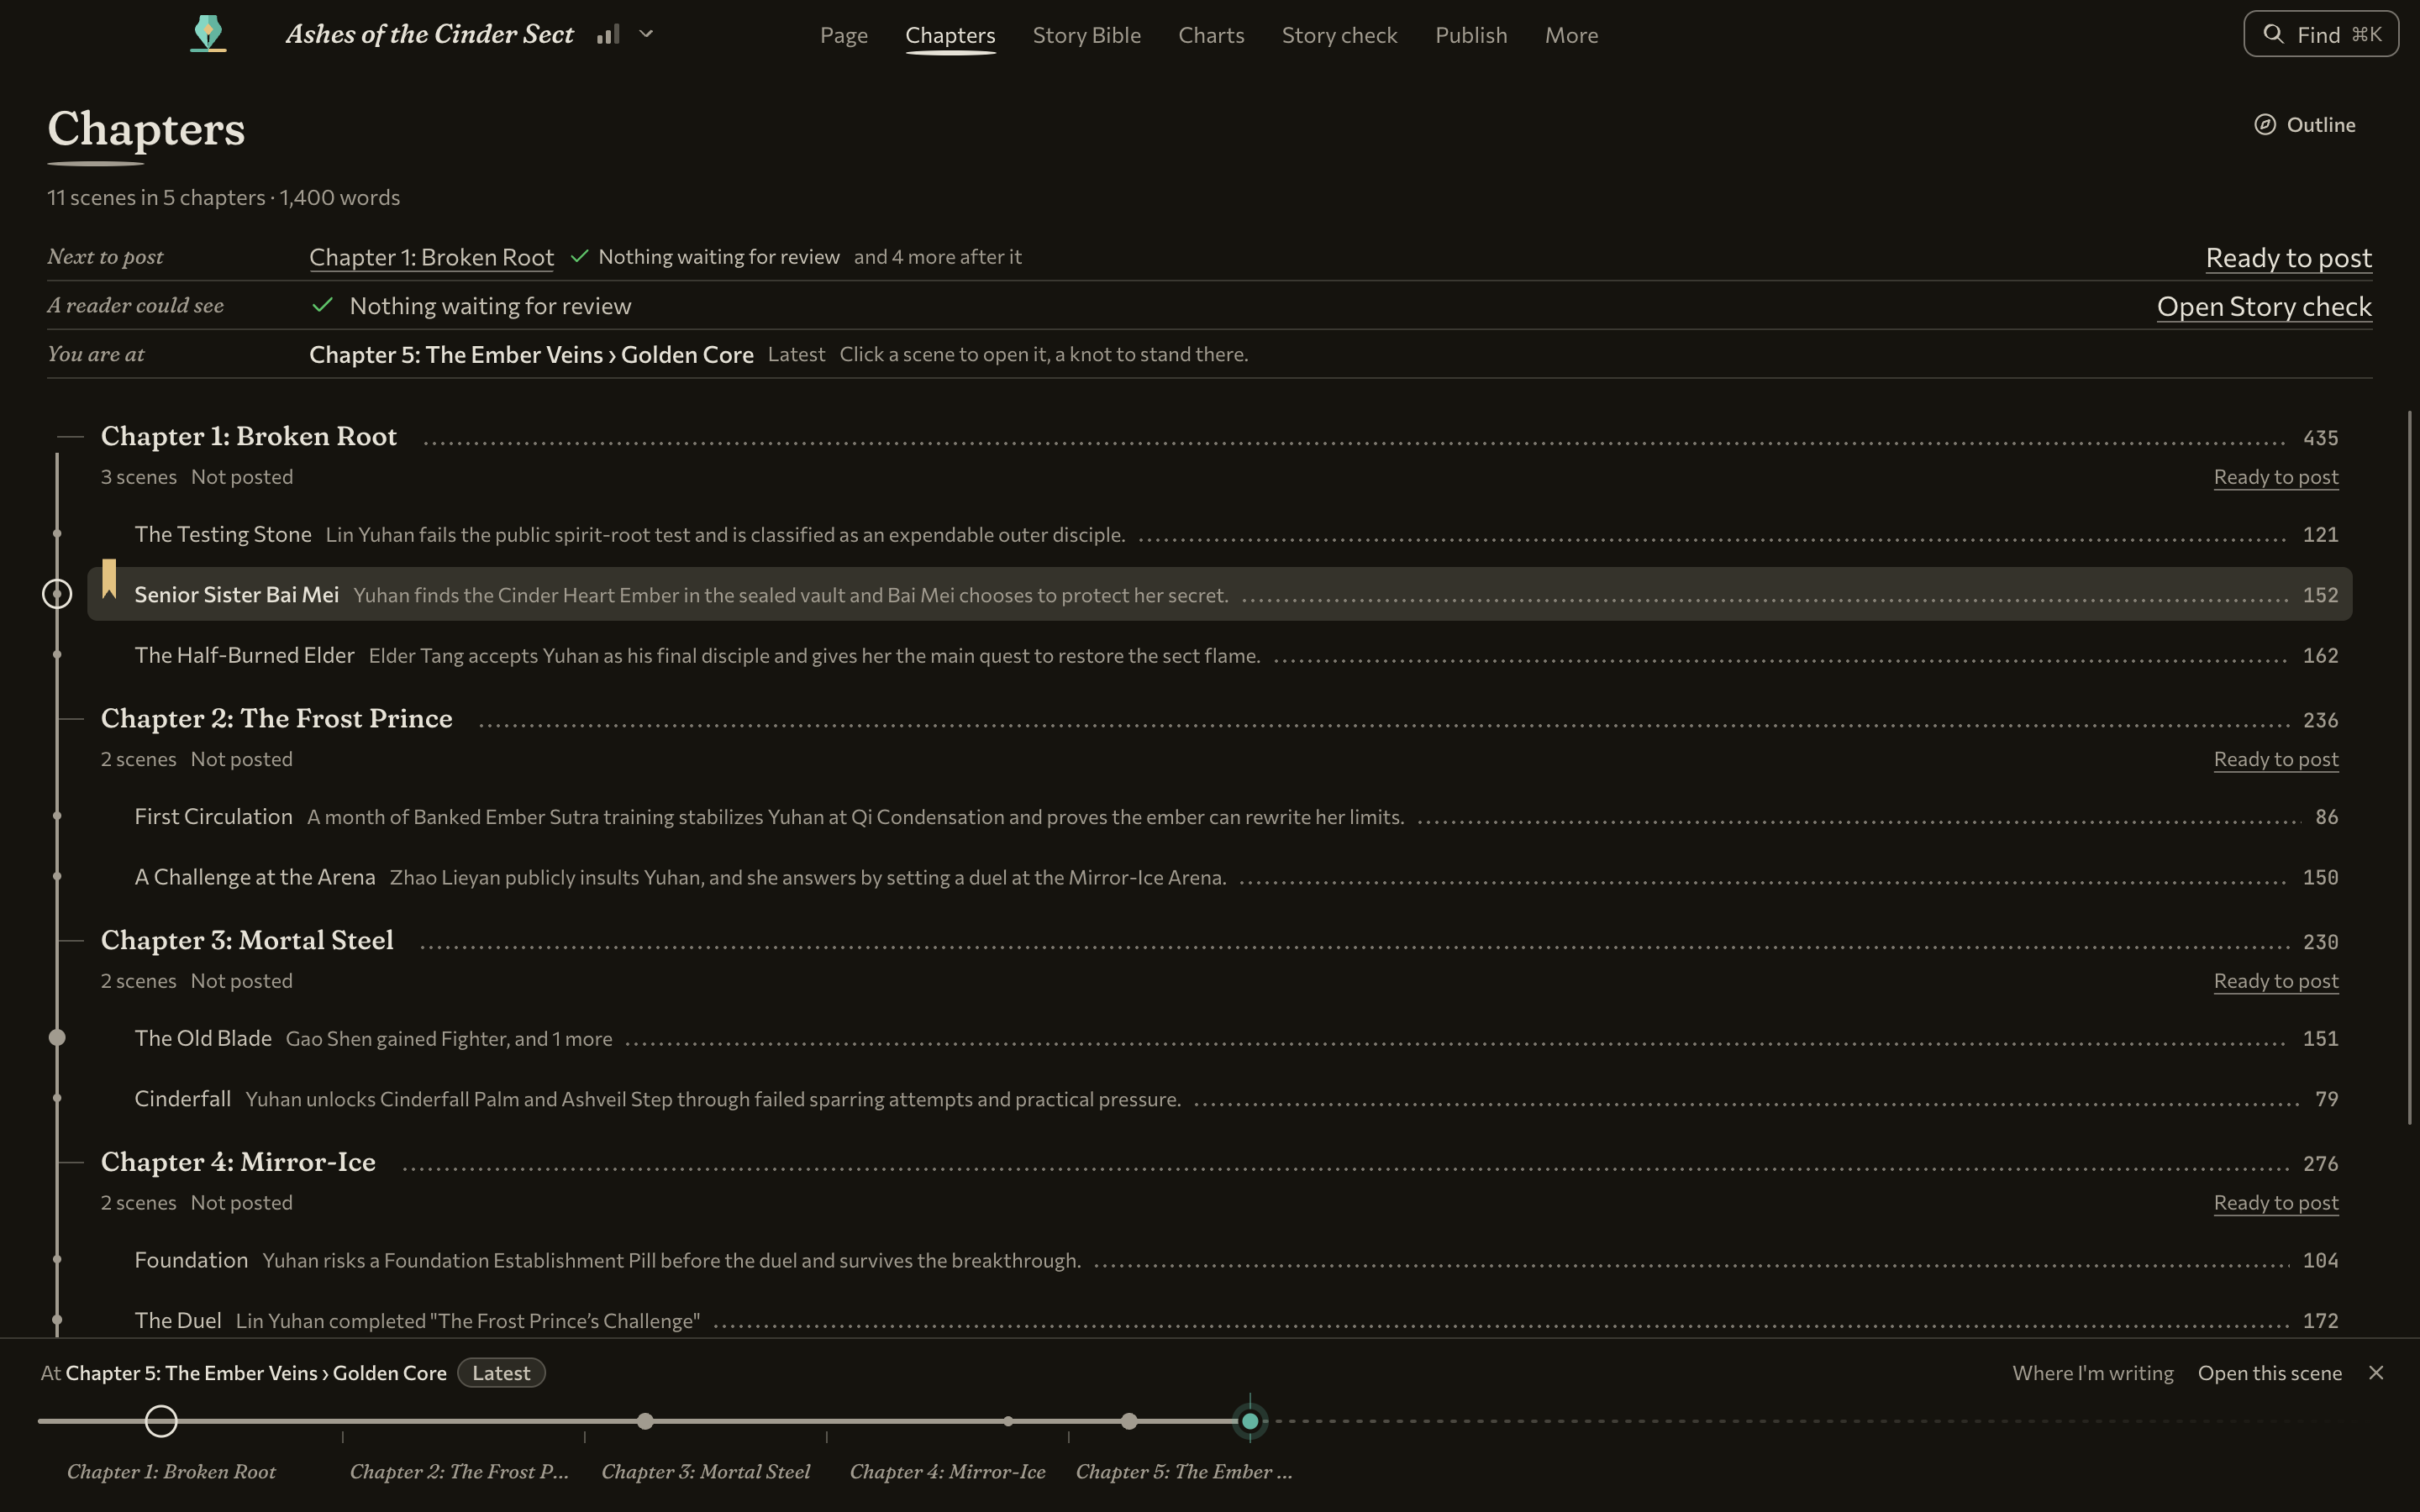
Set a word target and finish-by date in Writing Activity to see how many words you need to write each day. The Posting Queue uses the posted dates you’ve recorded to show your actual chapters per week over the past four weeks. Open Outline to work on the plan and use Charts to inspect recorded changes at a selected story position.
Open Chapter View when you want to read or edit across scenes in one chapter. Recent edits in multiple scenes are written to local recovery as you work. After a forced close, reopen the scene to review the offered text. If the saved text has changed in the meantime, the recovery offer gives you a copy to work from. Use Saved to confirm normal saves and keep regular backups. Very large scenes can exceed the recovery journal’s size limit.
Story Bible and Relationships at the point you need them
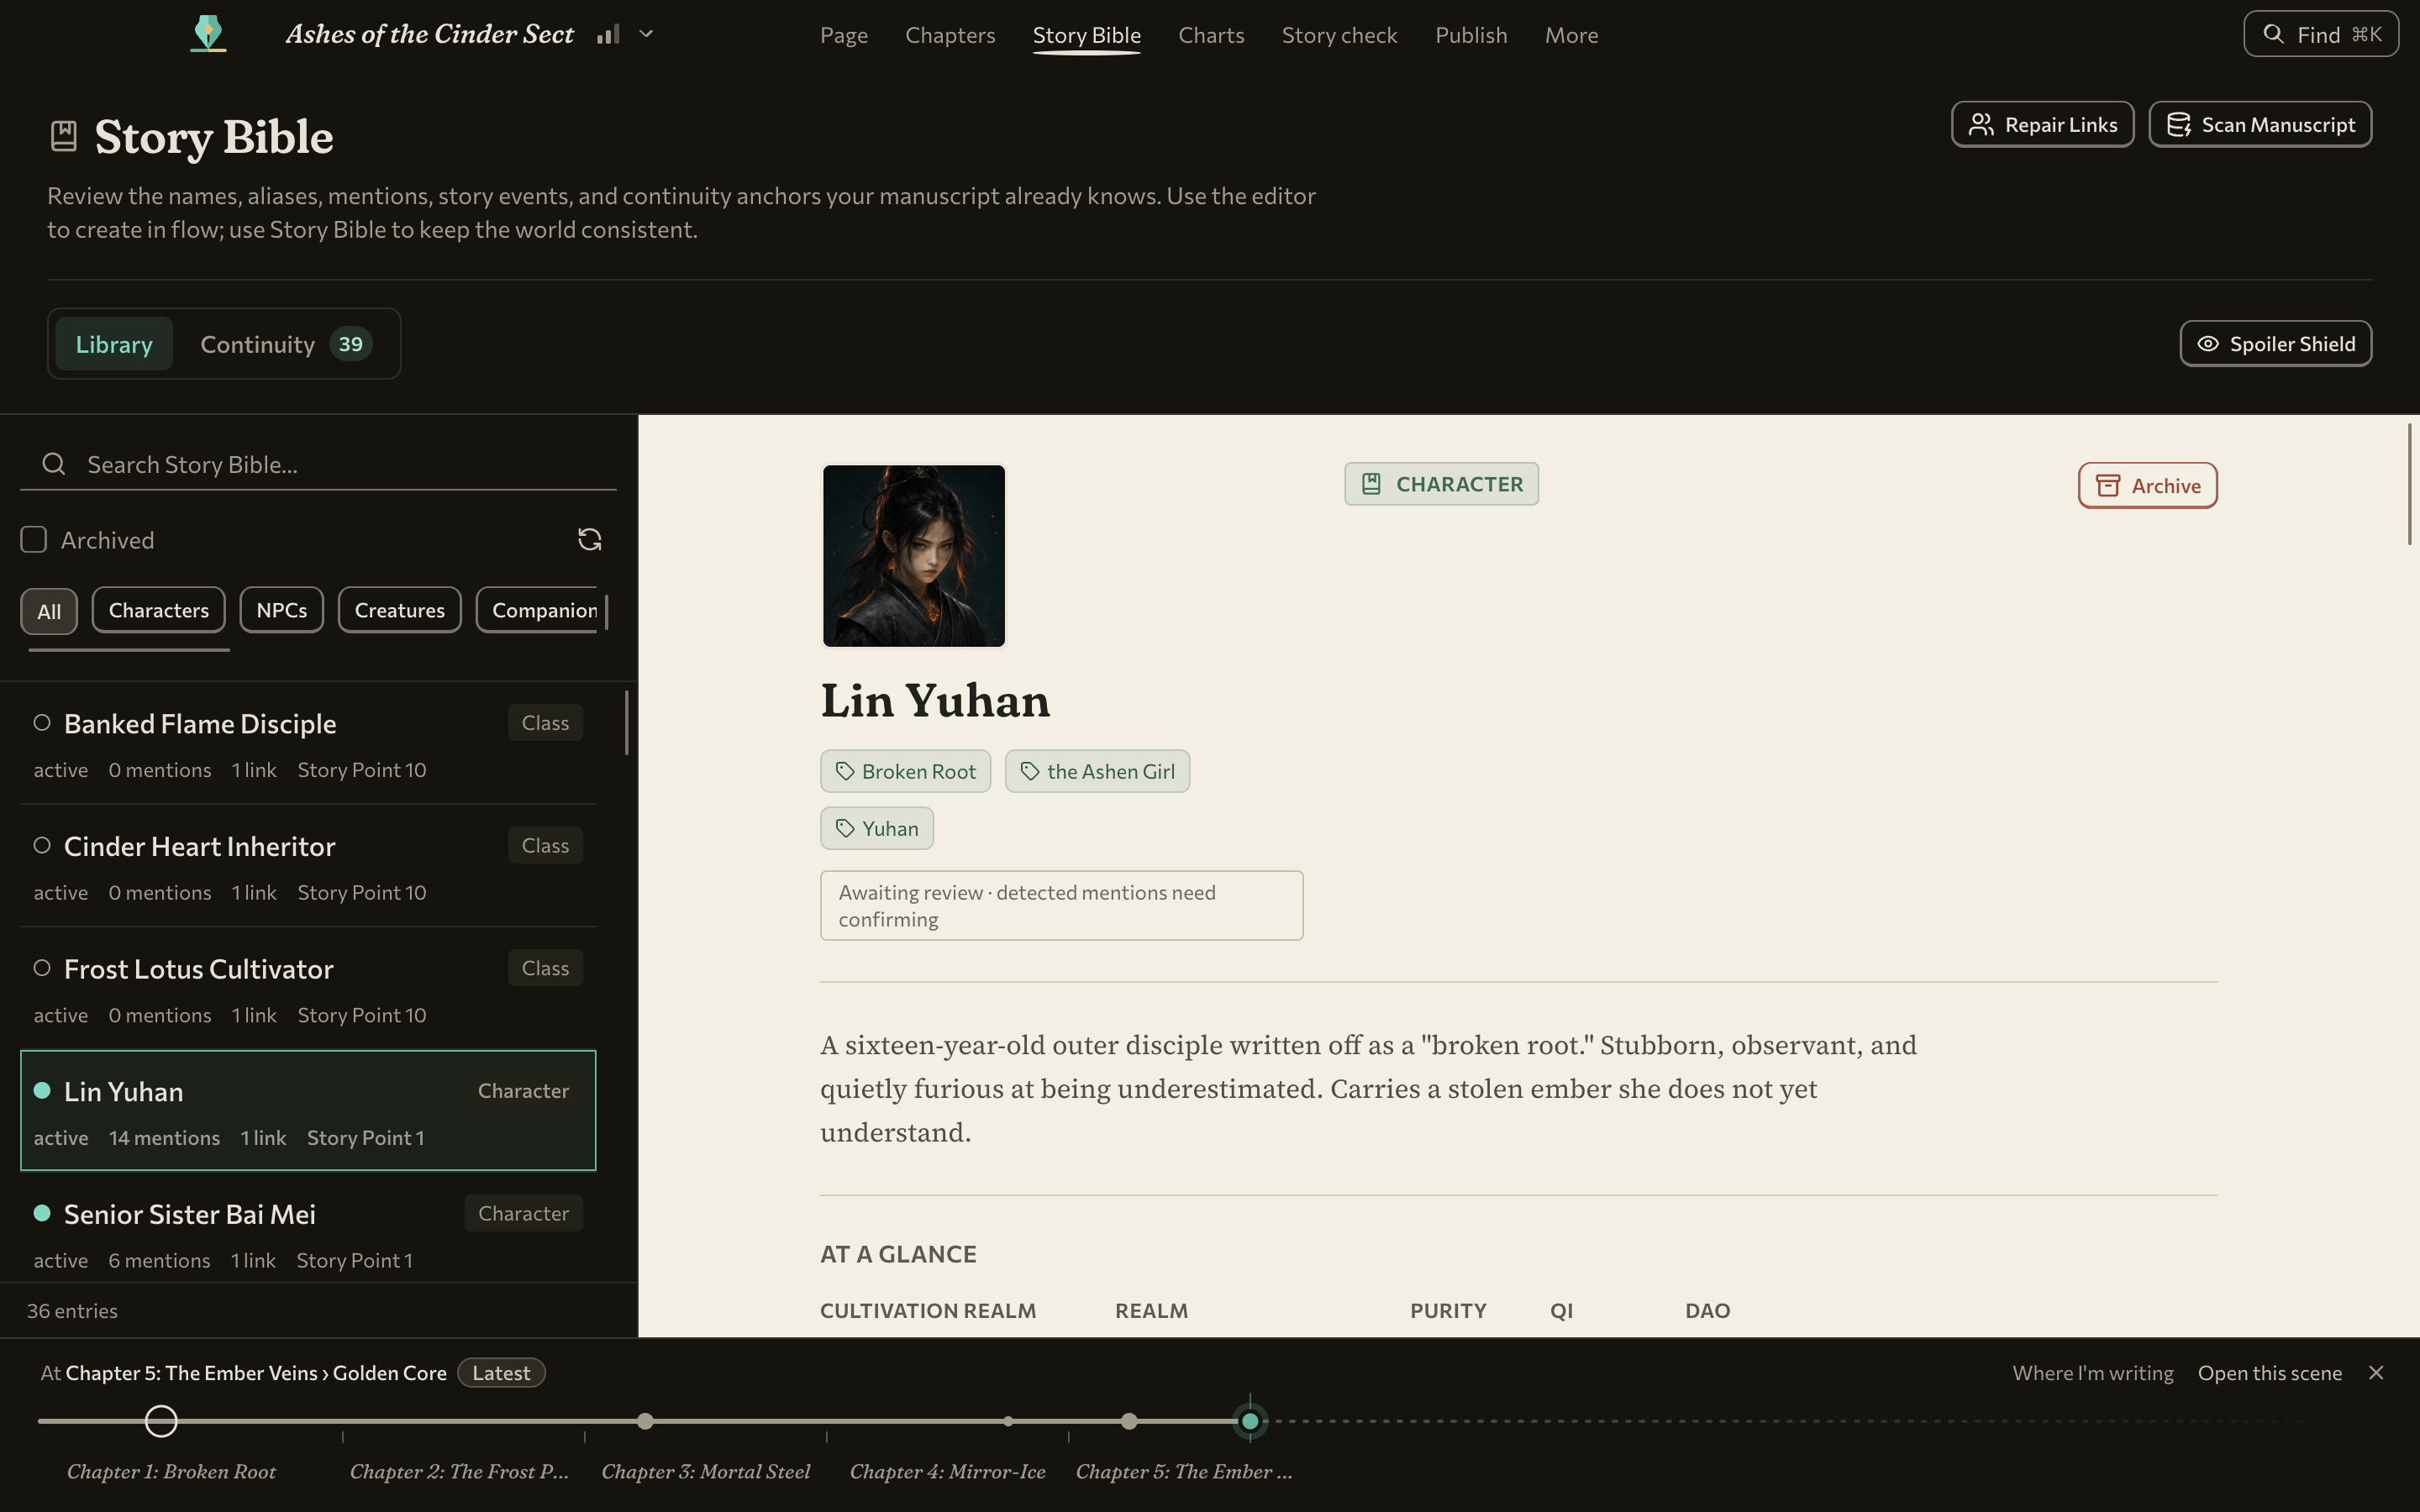
Story Bible is the name to look for in the top bar and Find. Search or filter the story’s people, locations, items, skills, factions, quests, and other records. A record brings together its aliases, mentions, and links. Open a character from the scene panel when you need context while writing. Characters is still where you work on the cast’s stats, equipment, and other character details. World Bible is still the name of the export.
New characters can join the project’s stat system, but their stat sheets start empty: creating a name no longer fills in starting numbers for you. Open the character’s Stats tab and choose Fill in starting values when you are ready to establish them. For example, introduce a new disciple while drafting, then fill in their stats when the story needs them. The included example already has its characters’ values filled in.
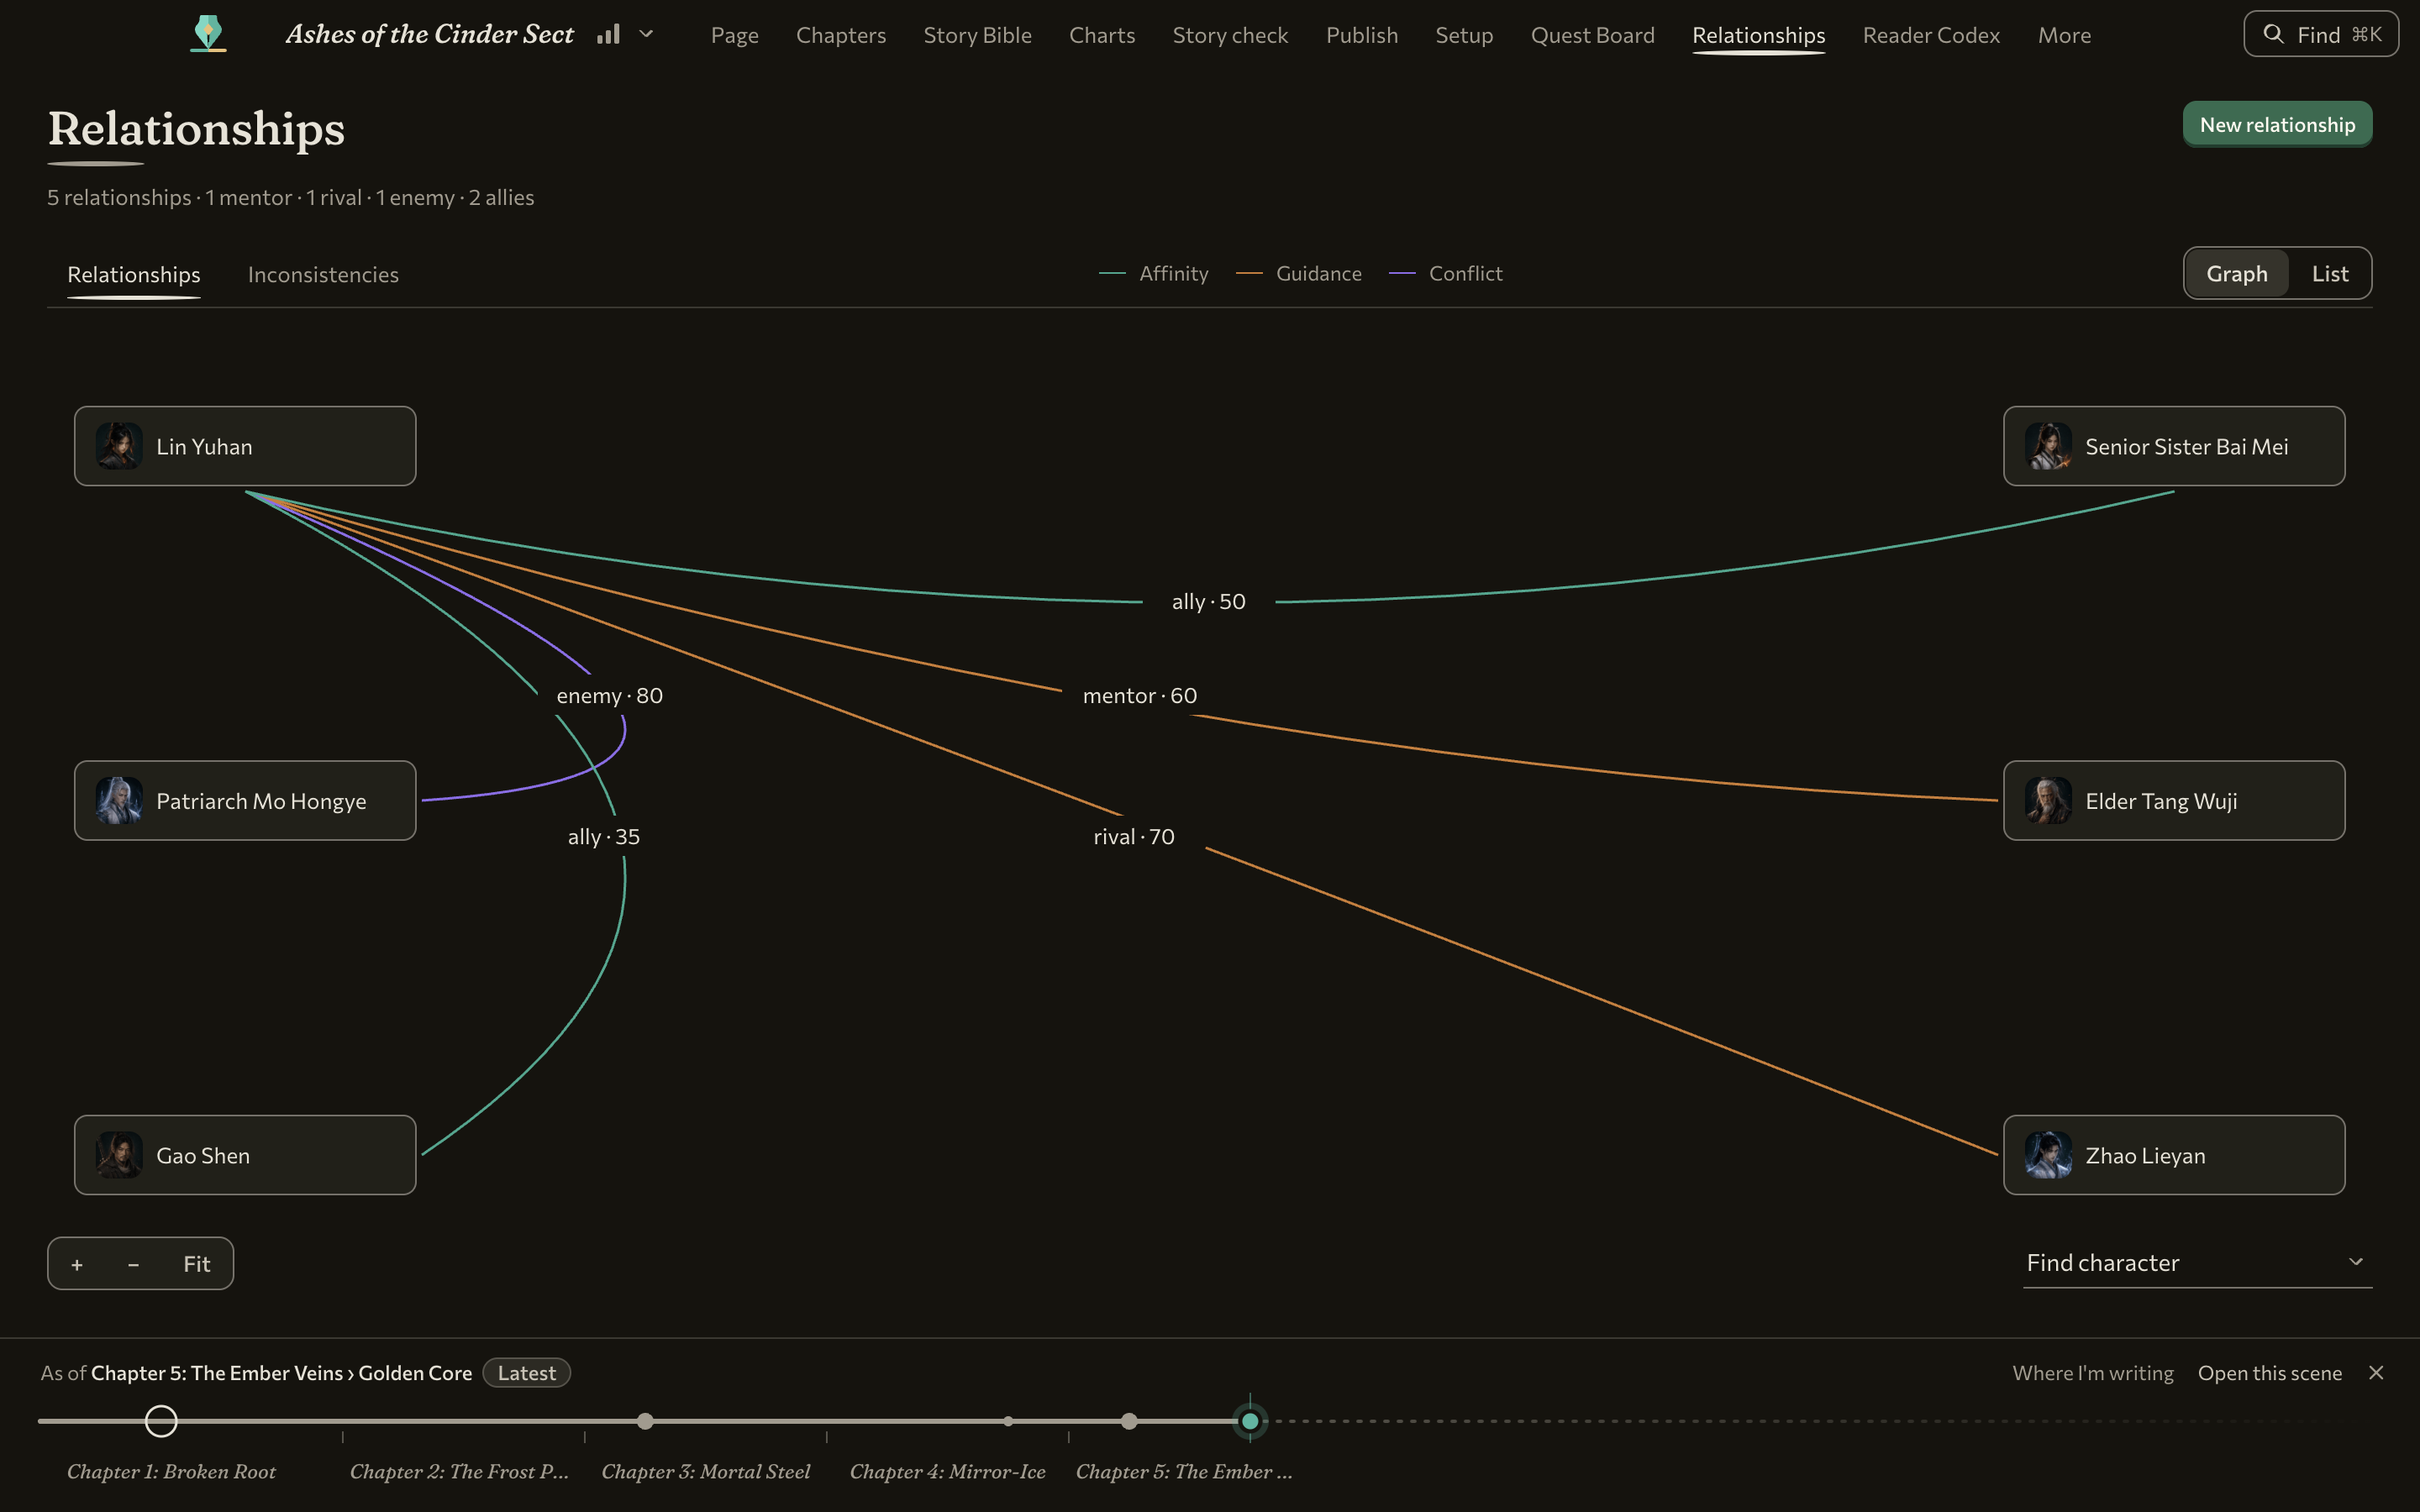
In Relationships, use the roomier graph to trace a connection, select a person to focus on their ties, or use List to look up a specific pair. Open a tie to see its details. When you compare a relationship or a stat across views, set the same story position first. A rivalry or a character’s Qi can be different by the end of the book.
Story Check, Publish, and Reader Codex
Story Check brings issues that may matter to a reader into one place, with links to the passages involved. In Publish, use the check as guidance while you review the selected chapter. Switch between Royal Road and Patreon previews. Copy for Royal Road offers Royal Road HTML for the platform’s source editor, Copy title for its title field, and Legacy BBCode for compatible forums. The Patreon copy uses labelled lines for stat blocks so the post can work without tables. Paste on the platform yourself and use Mark posted to keep a date for each platform in WriteIDE.
For a reader-facing reference, Reader Codex has a clearer path from choosing which entries to include to previewing the finished pages. Set Public through to the point readers have reached, then review the preview and spoiler receipt before exporting.
Revisions, project setup, and the library
Versions and Prepared chapters use the same comparison view. Read additions and removals, filter the comparison, and return to the version or chapter you opened it from. To retrieve old prose, prepare a chapter from a Version and open it in Publish. Versions can also put supported manuscript sections back, with a snapshot made before replacement. The Deleted shelf at the foot of the chapter list keeps removed scenes, chapters, and books available to put back.
Settings is available directly from the library, including when no project is open. Appearance and editor preferences are grouped together and save as you change them. Use Setup to work on stat systems, formulas, and templates. Quest Board, the review pages, and the library, Settings, and Help now use the same style as the writing desk. Menus, notes, and dialogs share the same visual cues for actions, keyboard focus, and confirmation.
If you move to another computer, use the library move tools and your backups. WriteIDE warns when a library appears to be open on another computer. Keep a separate backup before moving your working library.
Import a manuscript and keep its structure
Import review shows the chapter and scene layout before you commit. It can recognize plain chapter lines and offer to split very long scenes. Standalone Part and Act headings group numbered chapters or become chapters of their own when the manuscript has no numbered chapters. Ordered lists keep their starting numbers. Text before the first heading can come in as its own scene. Check the preview for headings, title and author lines, scene breaks, and any words or images the review says it could not carry over.
Single-column Word tables can come in as boxed text. Headings inside a box stay inside it. Embedded pictures appear as image blocks between the surrounding paragraphs. If a table’s layout changes on import, the preview flags it. When you make a Word copy of the manuscript, supported embedded images now stay pictures, including in scheduled Word exports. The imported project and the exported Word file are independent copies.
Export Quest Board threads for your notes or a forum
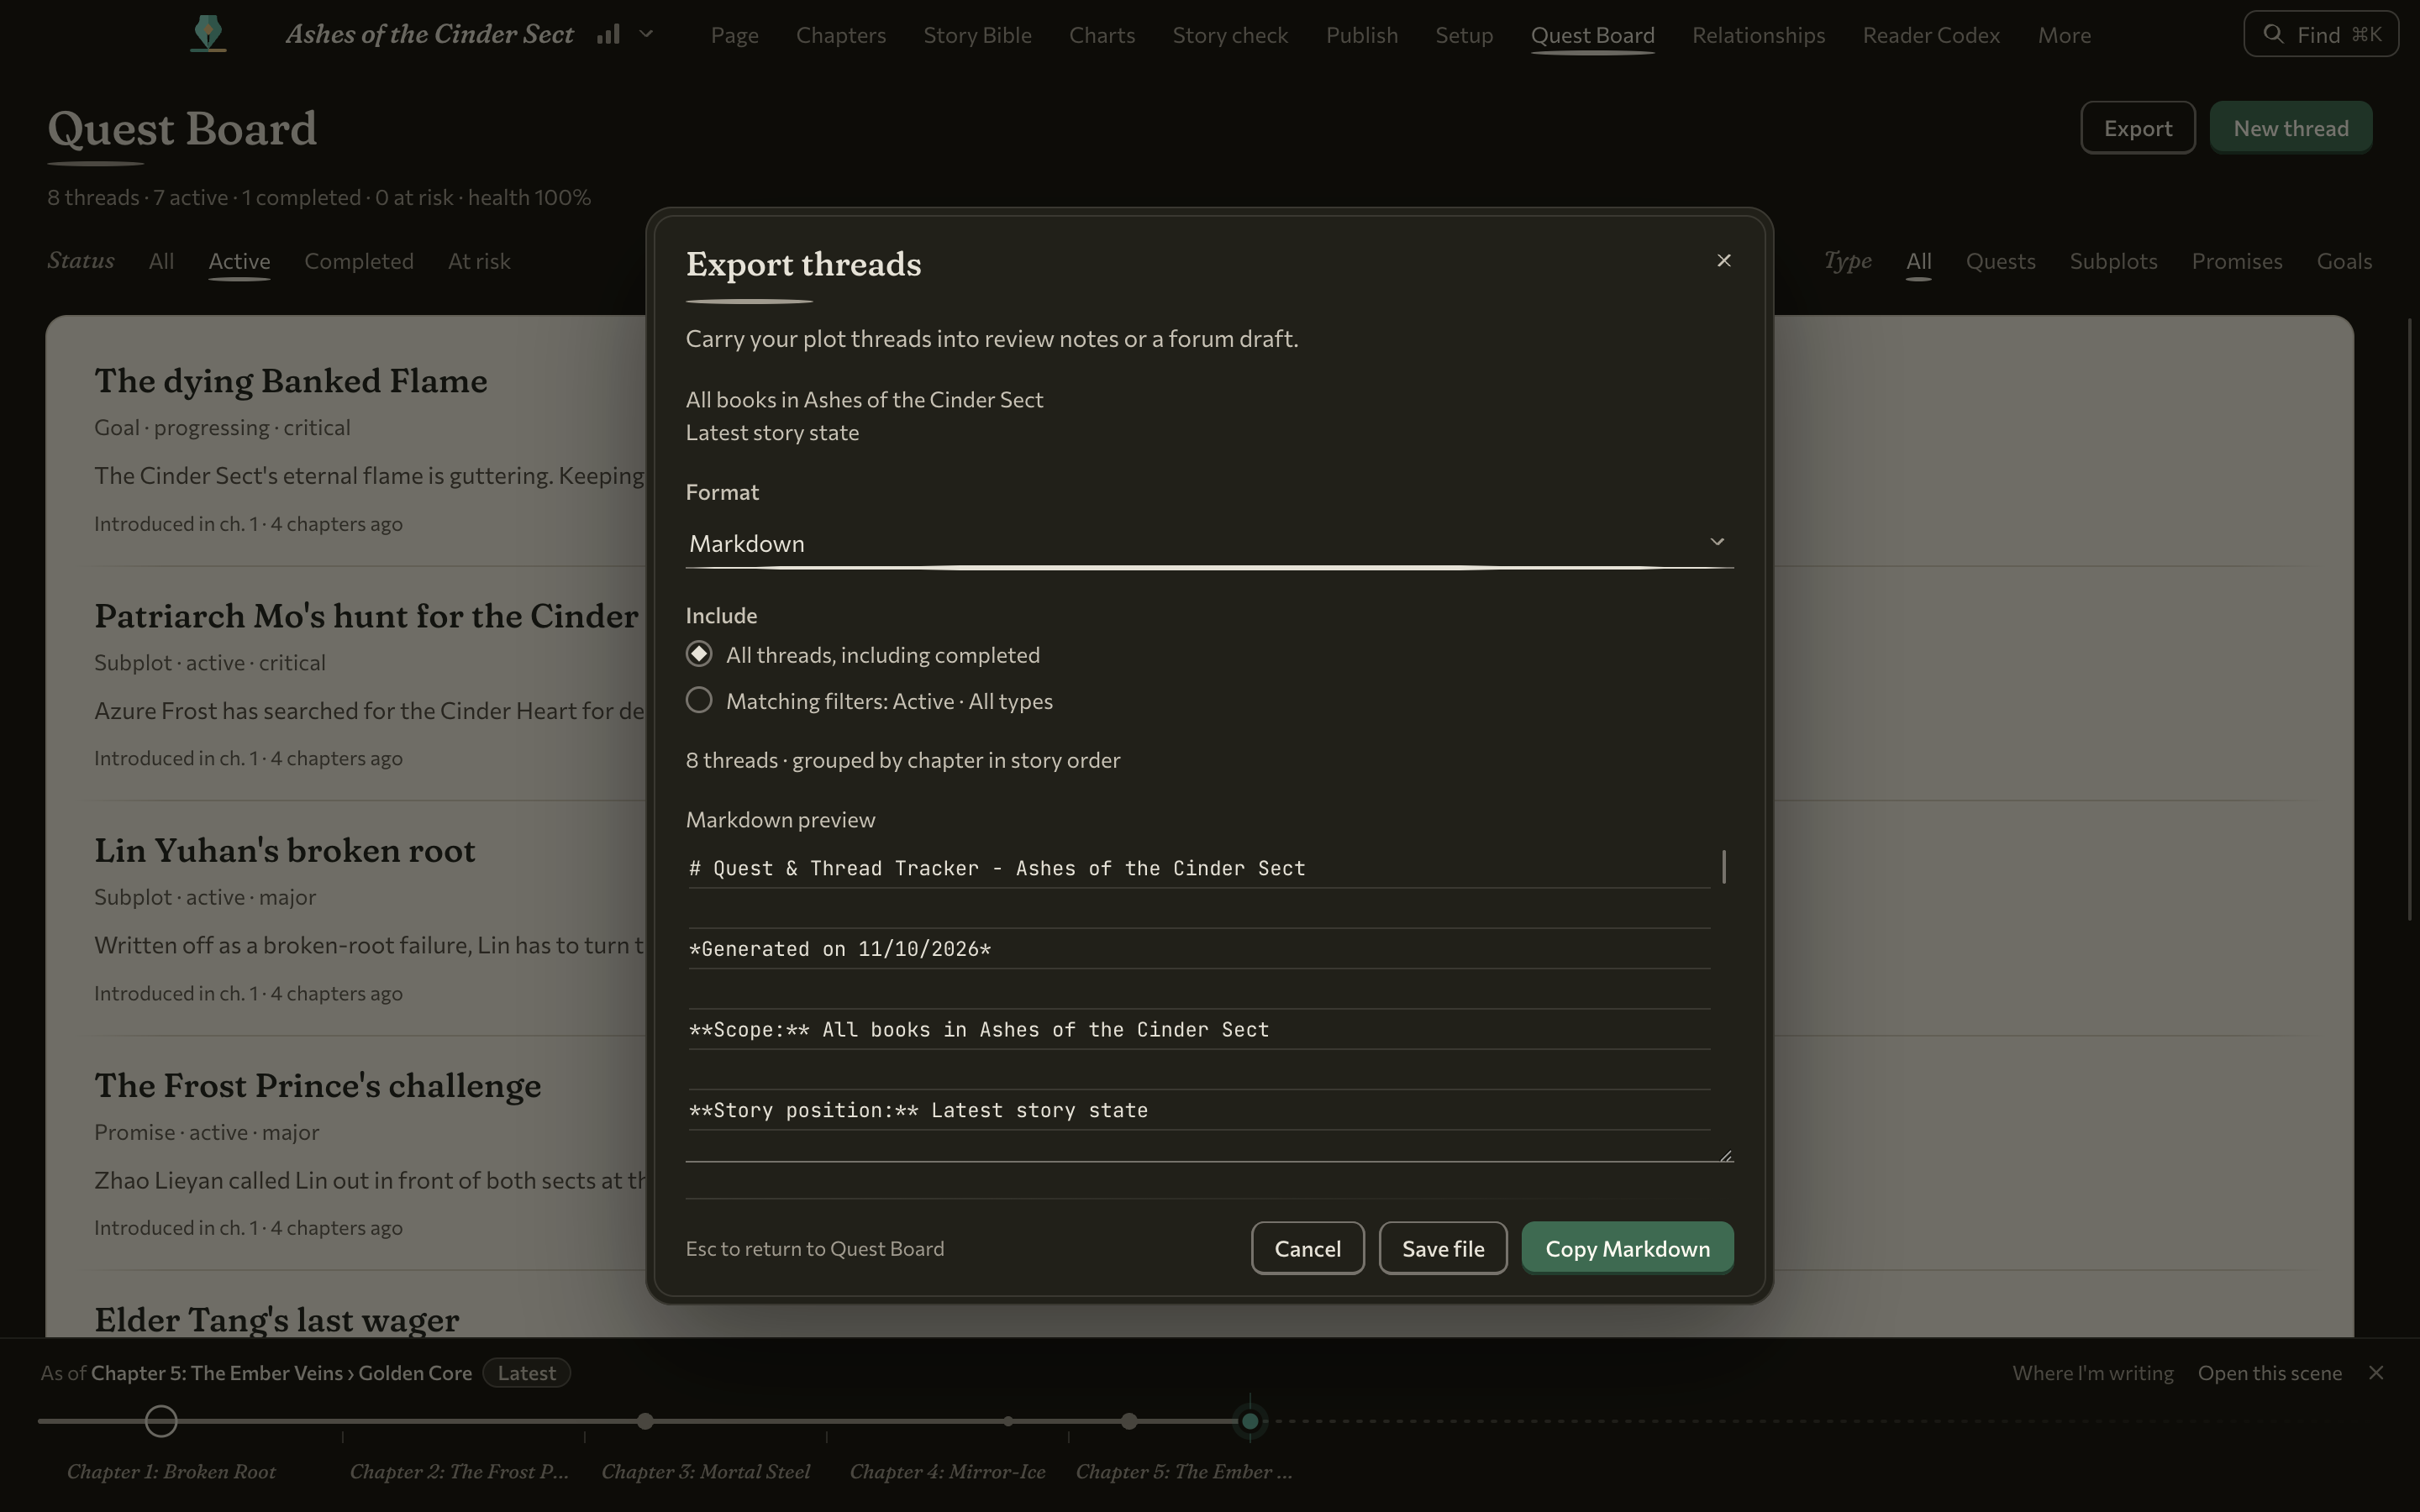
Open Quest Board → Export and choose Markdown for review notes or BBCode for a forum draft. Check the preview, then use Copy Markdown, Copy BBCode, or Save file. Chapter labels start at one, matching the board and sheet.
The default includes all threads across all books in the project, including completed threads. Select Matching filters to use the board’s current status and type filters. Both choices respect the current As of position. For example, pin the story line to a scene in Chapter 2 and the export can include a thread that began in Chapter 1 while omitting threads introduced later and mentions from Chapter 3. Descriptions and links still use their current text. Check the position and preview before sharing. Existing quest data and the structured quest import format keep their established chapter numbering.
Updating from 0.7.5 or the alpha
Back up your projects before updating. WriteIDE keeps a copy of the library before an update changes how it is stored. Keep your pre-update backup. A manual downgrade of an already upgraded library is unsupported.
The 0.7.7 Mac installer requires Apple silicon and macOS 13 Ventura or later. Use Settings → Updates to check for a stable update, or get the installer for your platform from the download page. If you used the 0.7.7 alpha, choose Stable in Updates to follow the stable channel.
The experimental chapter switcher is off by default. Chapters opens the full book view in the standard workspace. Go to scene is still available with Cmd/Ctrl+G and from the tab bar’s +. The chapter-switcher study is pending.
More fixes in 0.7.7
- Manuscript PDFs use bundled fonts for more languages and common stat symbols, with a warning and visible placeholder for unsupported characters. EPUB keeps emoji and uncommon Unicode, and Markdown preserves text that looks like an HTML tag or entity.
- Cancelling a slash command keeps the text you typed. Pending slash text is also preserved when leaving a scene.
- Typing and saving in long scenes do less work on the entire scene for each edit.
- Skill assignments and removals and inventory removals leave history entries. Inline stat edits have labelled Save and Cancel buttons.
- Settings → Diagnostics lets you review and save a local report when you want to share details of a problem.
The first stable release since 0.7.5, and 227 changes deep. I went looking for every way WriteIDE could lose an author's words and closed the ones I found. Then I gave the app a look of its own: warm paper on a dark desk.
21 min readWriteIDE 0.7.6: faithful exports, clearer screens, fewer lost wordsPDFs keep Cyrillic, Greek, accented text and common stat symbols readable, unsupported characters get a visible warning, and exports, recovery, navigation and everyday labels are clearer.
7 min readSometimes things don't always go as planned: 0.7.4, the release that never wasWriteIDE 0.7.4 never shipped. I skipped a version number, left a page promising it, and everything prepared for it landed in 0.7.5. Sorry!
2 min readNotes worth sending
Release notes when a version ships, plus Lab notes and guides. No weekly filler.